07. Robot Sensors
Robot Sensors
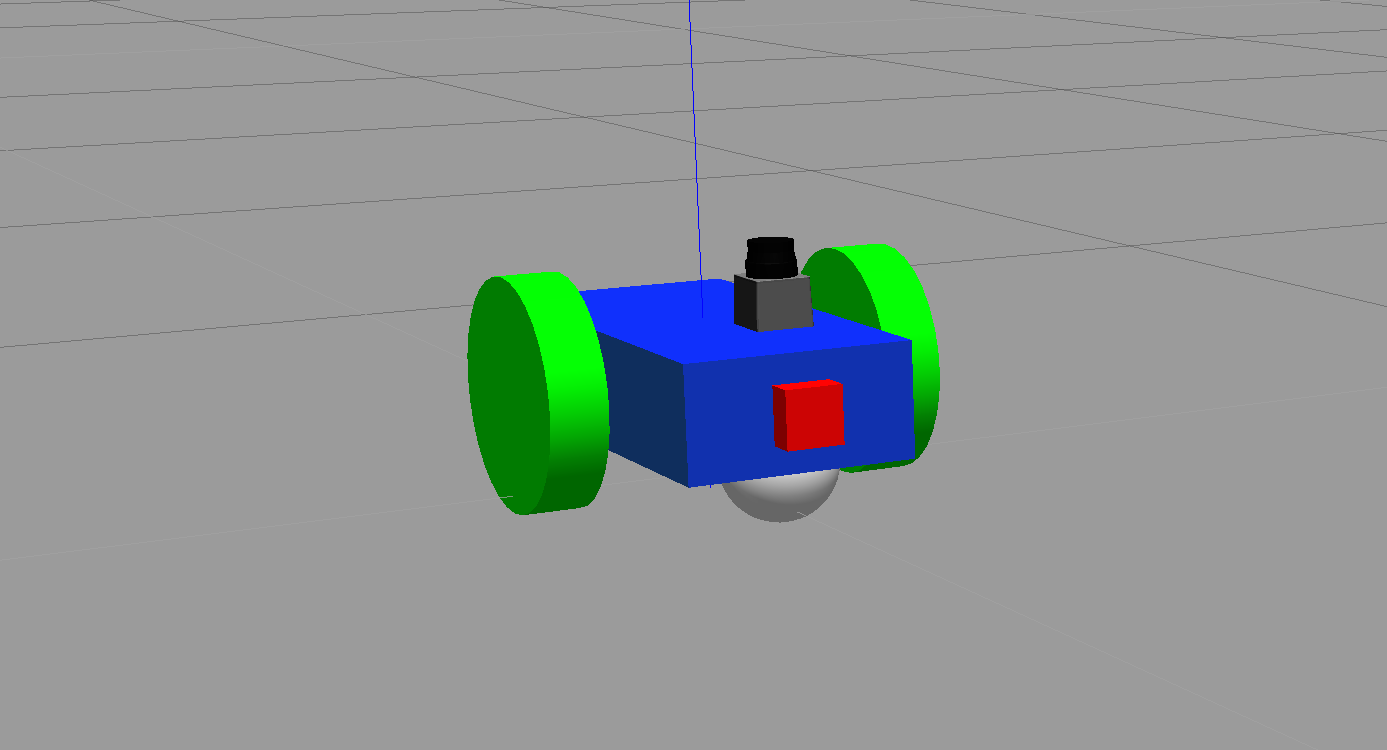
Earlier, you built a very basic robot model by creating its own URDF file. Then, you enhanced the model and added a wheel and a joint on each side of the chassis. Now, it’s time to add sensors to our robot so it can perceive its surroundings. You’ll add two sensors - a camera and a lidar .
Sensors
Camera: Cameras are one of the most common sensors in Robotics. They capture information that is easily interpreted by humans at a high resolution compared to other sensors. Every image captures millions of pixels. To extract depth information from camera images, people have started using stereo cameras. These work like your eyes do and are able to estimate distances to objects.
Lidar: Lidar stands for Light Detection and Ranging. It uses arrays of lasers to sense “point cloud” models of the environment. By measuring thousands of millions of times per second, lidar builds an accurate model of the world. However, the resolution is not nearly as high as that of a camera.
Add a Camera
First, add the camera link and a corresponding joint. Open the
my_robot.xacro
file and add a camera sensor based on the following specifications:
-
link name- "camera" -
link origin- "[0, 0, 0, 0, 0, 0]" -
geometry- box with size "[0.05, 0.05, 0.05]" -
mass- "0.1" -
box_inertia- m="0.1" x="0.05" y="0.05" z="0.05" -
inertia- ixx="1e-6" ixy="0" ixz="0" iyy="1e-6" iyz="0" izz="1e-6" -
joint name- "camera_joint" -
joint type- "fixed" -
joint axis- "[0, 1, 0]" -
joint origin- "[0.2, 0, 0, 0, 0, 0]" -
joint parent link- "chassis" -
joint child link- "camera"
As we covered in the previous section, each link should have its own
visual
,
collision
and
inertial
elements.
Add a Lidar
Now, let's add the lidar sensor. ROS supports many different types of sensors . One of them, that you will use for this robot and for the project, is the Hokuyo rangefinder sensor.
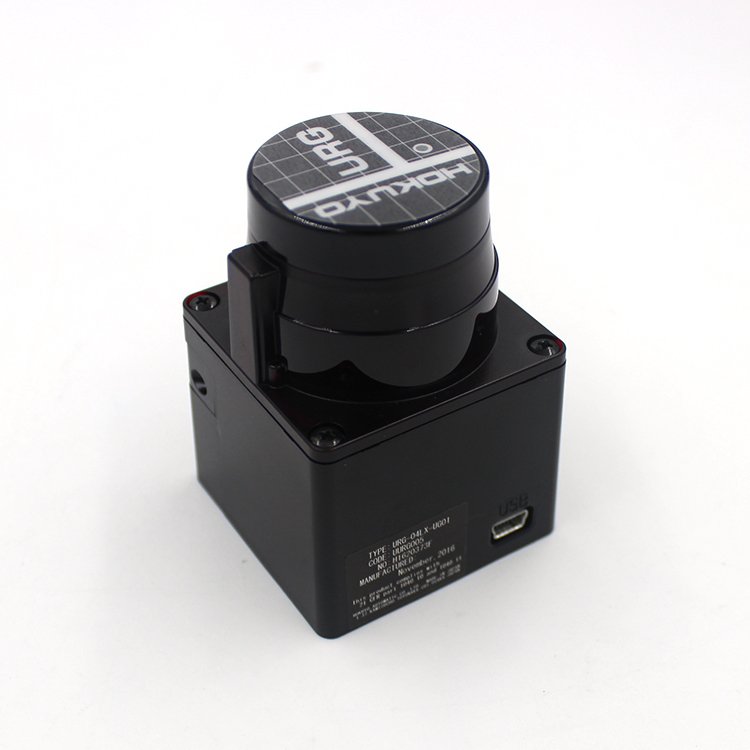
The Hokuyo sensor can be added to your robot model just like the camera sensor, except that you first need to add a mesh file to your robot model. Mesh files define the shape of the object or model you are working with. There are some basic shapes, like the box or cylinder, that do not require a mesh file. However, for more advanced designs, mesh files are necessary. The mesh file should be located in a directory called
meshes
that you can create in your package folder,
my_robot
.
1- Create
meshes
directory
Let’s create a
meshes
directory in
my_robot
to hold sensor mesh files:
$ cd /home/workspace/catkin_ws/src/my_robot/
$ mkdir meshes
2- Now, download this
hokuyo.dae
file and place it under the
meshes
directory you just created.
Wondering where I got the mesh file for the Hokuyo sensor? Gazebo shares the mesh files for its entire library of models .
3- Add the Hokuyo sensor to
my_robot.xacro
Here are the Hokuyo lidar sensor specifications:
-
link name- "hokuyo" -
link origin- "[0, 0, 0, 0, 0, 0]" -
geometryfor<collision>- box with size "[0.1, 0.1, 0.1]" -
geometryfor<visual>- filename = “package://my_robot/meshes/hokuyo.dae” -
mass- "1e-5" -
inertia- ixx="1e-6" ixy="0" ixz="0" iyy="1e-6" iyz="0" izz="1e-6" -
joint name- "hokuyo_joint" -
joint type- "fixed" -
joint axis- "[0 1 0]" -
joint origin- "[0.15, 0, .1, 0, 0, 0]" -
joint parent link- "chassis" -
joint child link- "hokuyo"
As we covered in the previous section, each link should have its own
visual
,
collision
and
inertial
elements.
Launch
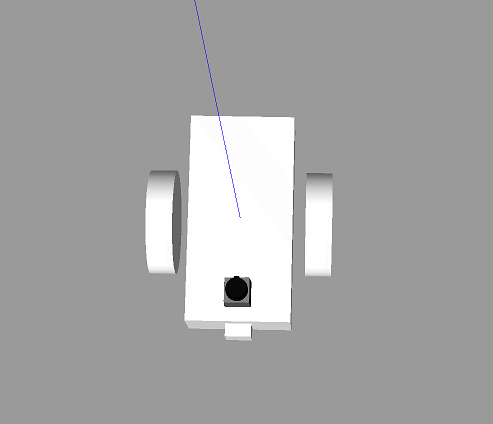
Excellent work! You created a robot model and added sensors to it. Now you can test your updated model in Gazebo:
$ cd /home/workspace/catkin_ws/
$ source devel/setup.bash
$ roslaunch my_robot world.launch
Now, let's see what your model looks like!
Wait, something's definitely wrong here.
Robot Sensors
SOLUTION:
materialTask Description:
Follow these steps to add two sensors to your robot:
Task Feedback:
Great job!